
Freeze Drying for Preppers: Building a 1-Year Food Supply at Home
Honestly, the world has been feeling pretty weird lately.
Every time you turn on the news, there is a new supply chain issue, a massive storm rolling in, or grocery prices jacking up higher.
It makes your stomach sink a bit. It makes you wanna look at your kitchen pantry and make sure your family is actually covered if things hit the fan.
So you decide to start prepping. You go to the local store and buy a bunch of regular canned beans, heavy bags of white rice, and some basic grocery items.
But let’s be totally real for a second. If you try to live off nothing but plain white rice and salty canned soup for months straight, you are gonna lose your absolute mind.
It is called appetite fatigue. It is a very real thing.
Worse, standard grocery store food doesn’t last anywhere near as long as the label promises once the room gets a little warm or damp.
A few years ago, I decided I was completely done buying those overpriced, salty commercial survival food buckets online. They taste like chemicals and cost a fortune.
“These Mylar bags are perfect for keeping my apple chips crispy.”
I decided to take matters into my own hands. I bought a home freeze dryer to build a real, high-quality 1-year food supply right in my kitchen.
It is the absolute ultimate cheat code for prepping.
When you freeze dry your own food at home, you aren’t just storing plain ingredients. You are storing your actual favorite home-cooked dinners.
You can dry full plates of beef stew, chicken curry, scrambled eggs, and fresh summer fruits. They lose all their heavy water weight but keep their original flavor and texture.
Best of all, they can sit on a shelf in a dark closet for up to 25 years without using a single watt of freezer electricity.
Let’s break down the exact, math-backed strategy to build a bulletproof 1-year food bank at home without blowing through your life savings.
Read also :Is Freeze Dried Fruit Healthy? The Truth About Nutrients and Sugar
The Secret Math of a True 1-Year Food Stash
The Calorie Counting Reality
Alright, so how much food do you actually need to survive for a full year? This is where almost every beginner prepper completely tanks their budget.
They look at those emergency food tins online that say “30-Day Supply” in big bold letters. But if you read the tiny nutrition label on the back, you realize it only gives you about 900 calories a day.
You would be starving and weak within a single week on that diet.
An average adult needs roughly 2,000 calories every single day to maintain their energy and strength during a stressful emergency situation.
The Big Annual Number
Let’s do some quick multiplication. 2,000 calories a day multiplied by 365 days means you need a staggering 730,000 calories per person for a full year supply.
That sounds like an impossible mountain of food to deal with. It feels totally overwhelming.
But because a freeze dryer extracts all the heavy, bulky liquid weight from your food, that entire year of survival nutrition can easily fit into just a few plastic storage totes inside a standard bedroom closet.
The Prepper Strategy: How Freeze Drying Destroys Other Options
I love to analyze my storage projects thoroughly before I commit to filling up my pantry shelves.
Here is exactly how home freeze dried stash items stack up against traditional prepping methods:
| Storage Feature | Standard Grocery Cans | Heavy Chest Freezer | Home Freeze Dried Food |
| Average Shelf Life | 1 to 3 years max | 1 year max (Before burn) | 15 to 25+ Years Total |
| Nutrient Value Left | Around 40% (Cooked away) | Around 60% over time | Over 97% original vitamins |
| Dependency on Grid | No | High (Blackout ruins it all) | Zero (Totally passive storage) |
| Weight Metric | Extremely heavy and clunky | Massive bulky iron appliance | Light as air (Weightless) |
| The Taste Factor | Metallic, soggy, super salty | Good (Until freezer burn hits) | Fresh, rich, and homemade |
See the massive difference? Freeze dried food wins the battle on every single front.
You get the extreme long shelf life of a tin can but with the high-end nutrition of a fresh garden meal.
Plus, you don’t have to worry about a massive storm knocking out your local electrical grid and rotting thousands of dollars of premium meat inside your garage chest freezer. Once it is sealed, it is completely safe from the world.
The 150-Meal Gummy Disaster: My Most Costly Field Mistake
Look, I gotta tell you a quick story about a massive blunder I made so you don’t ruin a whole month of hard work and waste your grocery cash like I did.
When I first decided to scale up my prep stash to hit that 1-year mark, I wanted to focus heavily on high-protein dinners. I cooked up a massive, beautiful mountain of shredded beef roast with potatoes and thick gravy.
I filled up 15 full metal trays over a whole week. I ran the machine back-to-back.
The pieces felt completely dry to the touch when I pulled them out. I got lazy and rushed the packaging.
I dumped the dry food chunks into fifty separate Mylar bags. I dropped an oxygen absorber into each one, hit the edges with my flat iron, and stacked them into my plastic bins.
I thought I was an absolute survival genius.
It was an absolute nightmare.
The Hidden Liquid Trap
-
The Mistake: I didn’t test the center of the thick potato chunks, and my final drying temperature was set too high at 130°F.
-
The Reaction: The high heat scorched the outer crust of the potatoes, locking a tiny bit of moisture inside the core. It was sitting right around 65% humidity inside that hidden pocket.
-
The Result: About eight months later, I opened a bag to test the flavor. It was totally ruined.
The trapped moisture had seeped out into the meat over time. The fat had gone completely rancid, and a gross white mold had spread across the entire batch.
I had to throw all fifty bags straight into the garbage bins. Total loss of 150 full meals and about three hundred bucks of premium beef. I wanted to sit on my garage floor and cry.
The Thermometer Pro Hack
Learn from my pain. Never trust a simple touch test when your family’s survival food is on the line.
Always buy a cheap, digital infrared laser thermometer gun.
The exact second your freeze dry cycle finishes, open the door and shoot the laser directly at the thickest piece of food on the tray.
If that piece shows a temperature that is lower than the surrounding tray—even by just 3 or 4 degrees—it means there is hidden ice still melting inside the core. Put the trays back in the chamber for another 3 hours of extra dry time immediately.
Step-by-Step: The 1-Year Stash Building Blueprint
Wanna build your own bulletproof food bank without burning out? Follow this systematic blueprint to hit your targets easily.
-
Ditch the Single Ingredients: Stop drying plain corn or plain carrots. It takes too much time to combine them later. Focus on freeze drying full, balanced, high-calorie dinners like chili, chicken Alfredo, or beef stew.
-
Cook Double at Dinner: This is the easiest way to prep. Every single time you make dinner for your family, double the recipe. Eat half tonight, and pour the other half straight onto your lined freeze dryer trays.
-
The Silicone Sheet Trick: Always line your trays with high-quality silicone baking mats. Food that is packed with sugars or starches will bond to bare aluminum like commercial glue, making clean up a total nightmare.
-
The Deep Pre-Freeze: Put your loaded trays in your kitchen freezer at 0°F for at least 12 hours before they touch the machine. Pre-freezing saves hours of machine cycle time and keeps your vacuum pump running clean.
-
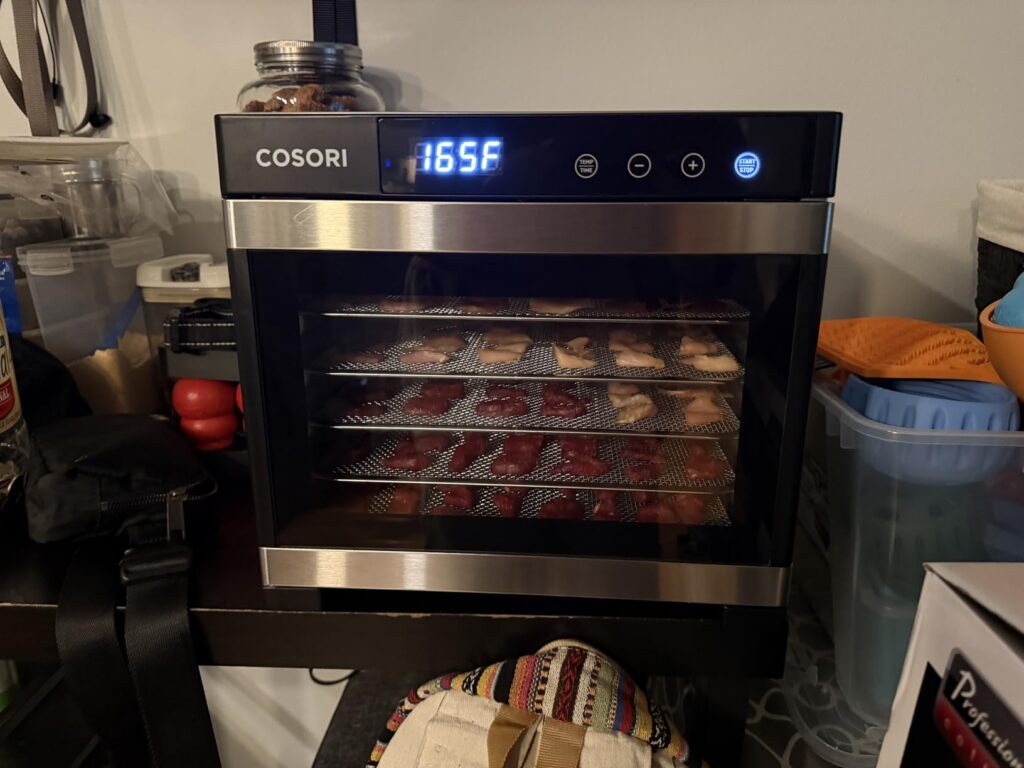
Keep Processing Temps Low: Set your final drying shelf temperature to a maximum of 115°F degrees. Keeping the heat gentle prevents your food fats from melting and keeps your proteins perfectly tender for future rehydration.
-
Pack Fast and Seal Tight: The second the machine buzzer goes off, move fast. Drop your dry food bricks inside a thick, 7-mil Mylar bag. Drop a fresh 300cc oxygen absorber packet into the pouch.
-
The Ultimate Flat Iron Seal: Crank your household hair straightener up to 375°F. Clamp it down on the open edge of the Mylar bag for four seconds to create a permanent, airtight melt weld.
The 3 Foundation Food Groups for Your Survival Closets
To make sure your year-long stash stays balanced and actually tastes good during a crisis, you want to divide your processing runs into three distinct zones.
1. The Protein Lifelines
This is your foundation. Focus heavily on shredded chicken breast, lean ground beef taco meat, and raw eggs blended into sheets. Meat keeps your muscles strong when you’re working hard during an emergency. Always trim off 100% of the visible fat before drying to prevent spoilage.
2. The Comfort Carbs
Load your shelves with freeze dried lasagna, thick potato soups, and macaroni and cheese. Carbs are pure comfort food. They trigger happy brain chemicals when everything else outside is going crazy, which is huge for keeping morale high.
3. The Vitamin Boosters
Don’t skip the greens and sweets. Sliced strawberries, ripe bananas, sweet corn, and bell pepper strips freeze dry beautifully. They provide the fresh enzymes and vitamins your body needs to fight off sickness when fresh produce is totally wiped out from stores.
Frequently Asked Questions
How much does it cost in electricity to run a machine for a year?
If you run your home freeze dryer constantly to build a stash, it will bump your monthly utility bill up by about $35 to $50 depending on your local power rates. Over a full year, you’re looking at around five hundred bucks in electricity, which is still way cheaper than buying commercial emergency food cans.
What foods absolutely will NOT last 25 years?
Anything with an incredibly high fat, oil, or sugar content is a bad idea for the long haul. Stuff like peanut butter, real butter, sausage, or pure chocolate will not freeze dry properly because grease cannot freeze into an ice crystal. Those items will go rancid within 1 to 2 years max, even inside a sealed Mylar pouch.
How do I store the finished bags safely?
Never just stack your foil Mylar bags loosely on a closet shelf. Mice and rats have incredibly sharp teeth and can smell hidden food right through the plastic lining if they get hungry enough. Always pack your sealed pouches inside heavy duty, snap-top plastic storage totes to keep them totally safe from pests and light.
The Verdict: The Ultimate Peace of Mind
At the end of the day, looking at the state of the world and doing absolutely nothing to prepare can leave you feeling completely helpless and stressed out.
But learning how to build a real, high-nutrient 1-year food supply with your home freeze dryer completely changes the game.
It stops food waste in your kitchen right now, saves you thousands of grocery dollars over the long haul, and gives your family an incredible, bulletproof insurance policy that stays fresh for decades.
I’m sealing up a massive fresh double batch of venison chili and sweet cinnamon apples right now to slide onto my basement survival shelves.
Trust me on this one. Check your internal core temps with a laser, keep your machine heat under 115°F, seal those thick Mylar bags tight with a fresh absorber, and start building your bank. Your future self is gonna thank you big time.
Pingback: Vacuum Pump Maintenance: How to Change Oil in Your Freeze Dryer Safely -
Pingback: How to Freeze Dry Liquid Meals: Safe Methods for Soups and Stews -
Pingback: Freeze Drying Vegetables 101: Best Veggies for Long-Term Storage -
Pingback: Freeze Dried Coffee: How to Make Your Own Premium Instant Blend -
Pingback: How Long Does Freeze Dried Food Really Last? (Storage Secrets Revealed) -
Pingback: Harvest Right Freeze Dry Machine: Is It Worth the Investment in 2026? -