

How to Freeze Dry Skittles:
Before we get into the “how,” let’s talk about the “why.” Not every candy reacts well to a freeze-dryer. Some just sit there and get cold. But Skittles? They are the gold standard.
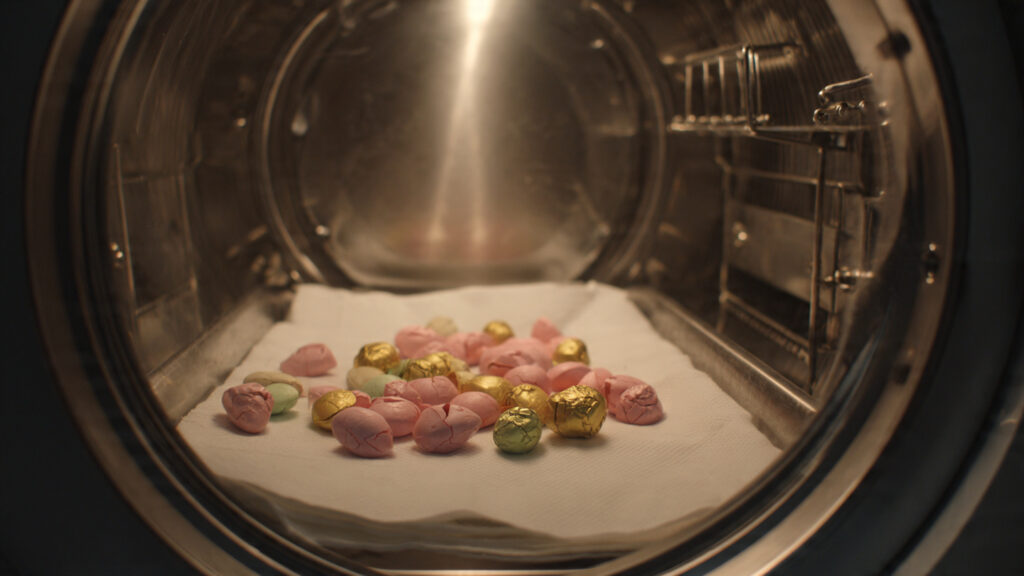
The science is actually pretty cool. Skittles have a hard sugar shell and a chewy, moisture-rich center. When you put them under a vacuum in a freeze-dryer, the moisture inside wants to escape. As it turns into vapor, it pushes against that sugar shell until it cracks. This causes the candy to “puff” out, doubling or even tripling in size.
The result is a texture that feels like a Cheeto but tastes like a fruit explosion. It’s concentrated. It’s loud. It’s addictive.
The Essential Equipment: What You’ll Need
I’ll be honest with you—the best way to do this is with a dedicated freeze-dryer. However, I know those are expensive. We’ll talk about the professional way first, then I’ll give you some “DIY” alternatives that people try at home, though they won’t give you that same dramatic puff.
1. The Professional Freeze-Dryer
This is the only way to get that authentic, airy crunch. You’ll need the machine, the trays, and some parchment paper.
2. The Candy
Original Skittles are the classic choice, but don’t sleep on the Sour or Wild Berry versions. The Sour ones, in particular, get a very interesting “zing” when the moisture is gone.
3. Storage Bags
Once these are done, they absorb moisture from the air faster than a sponge. You’ll need Mylar bags or airtight Mason jars. If you leave them on the counter for an hour, they’ll turn into a sticky mess.
Step-by-Step: The Professional Method
If you have access to a freeze-dryer, here is the secret to the perfect batch.
Step 1: Prep the Trays
Line your metal trays with parchment paper. Skittles contain a lot of sugar, and if they explode (which is the goal!), they can stick to the metal. Parchment paper makes cleanup a five-second job instead of a thirty-minute scrub.
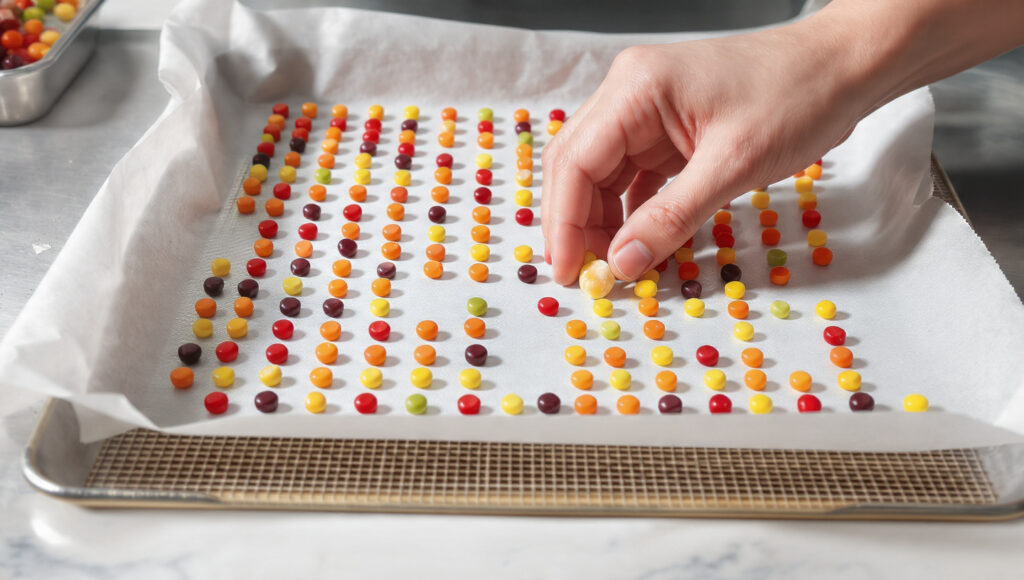
Step 2: The Layout
Don’t just dump the bag onto the tray. You want to spread them out in a single layer. Give them a little breathing room. Remember, these things are going to expand. If they are too close together, they’ll fuse into one giant candy brick. It still tastes good, but it’s much harder to eat!
Step 3: Pre-Warming (The Pro Tip)
Most modern machines have a “Candy Mode.” If yours doesn’t, here’s a trick: warm the trays slightly before starting the vacuum. When the candy is warm, the centers are more pliable. This allows them to “pop” much more easily once the vacuum starts pulling the air out.
Step 4: The Process
Set your machine to the candy setting. Usually, this involves a shorter freeze time and a longer drying time at a slightly higher temperature (around 135°F to 150°F). A typical batch takes anywhere from 2 to 4 hours.
Step 5: The “Dryness” Test
When the timer goes off, don’t just pull them out and seal them up. Take one out and break it in half. It should be bone-dry all the way through. If the center feels even slightly tacky or soft, put them back in for another hour. Any leftover moisture will ruin the shelf life.
Can You Freeze-Dry Without a Machine?
I get this question a lot. People want that crunch but don’t want to spend thousands on a machine. While you can’t truly freeze-dry without a vacuum, you can try these “hacks.” Just manage your expectations—they won’t be as puffy!
Stay Crunchy: Prevent sticky candy with 7-Mil Mylar Bags & Oxygen Absorbers. View on Amazon
The Dry Ice Method
You can place Skittles in a container (not airtight!) and bury it in dry ice inside a cooler for about 24 hours. The dry ice “sublimates,” meaning it turns from a solid to a gas, taking some of the moisture from the candy with it. It creates a colder, crispier Skittle, but it won’t have that iconic “shatter” texture.
The Deep Freezer Method
This is the “long game.” Place Skittles on a tray in the back of your freezer and leave them there for several weeks. Eventually, through a process called sublimation (the same thing that causes freezer burn), the moisture will slowly leave the candy. It’s a fun experiment, but it’s definitely not a quick fix.

Troubleshooting: Why Didn’t My Skittles Pop?
It’s heartbreaking to wait four hours only to find Skittles that look exactly the same as when they went in. Here are the three most common reasons for a “fail”:
-
The Room Was Too Cold: If your freeze-dryer is in a very cold garage, it might struggle to get the candy warm enough to expand.
-
The Vacuum Leak: If the machine can’t pull a strong enough vacuum, the moisture won’t “burst” through the shell. Check your door seal!
-
Old Candy: Sometimes, really old, stale Skittles have already lost their internal moisture. If the center is already hard, it won’t expand. Fresh, soft Skittles actually work best.
Creative Ways to Use Your Crunchy Treats
Once you have a jar of these, you’ll find yourself putting them on everything. Here are a few ways I’ve found they really shine:
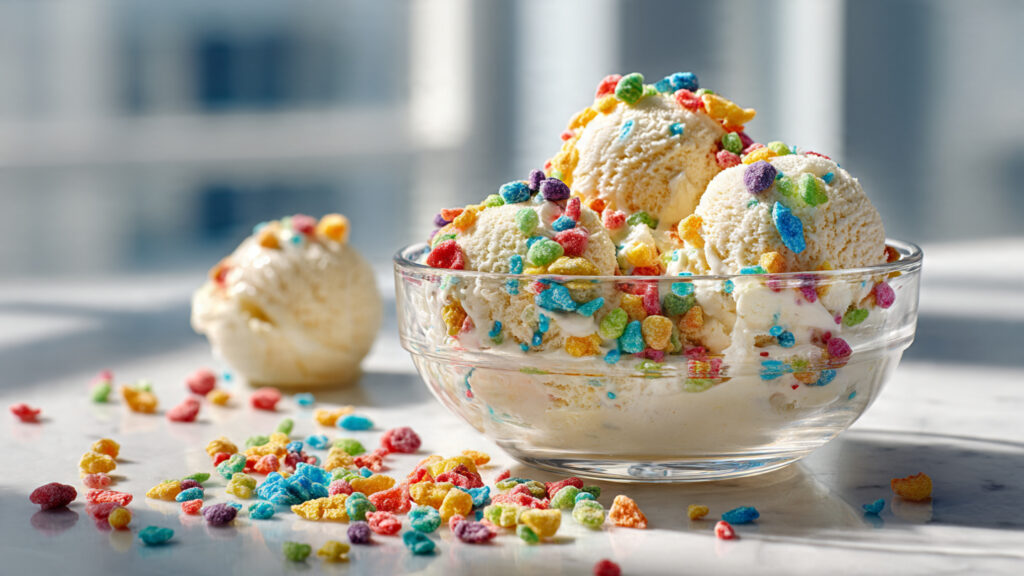
1. The Ultimate Ice Cream Topping
Regular Skittles get rock-hard when they touch cold ice cream. They can practically break a tooth. But freeze-dried Skittles? They stay crunchy. Sprinkle them over vanilla bean ice cream for a texture contrast that is out of this world.
2. The “Space” Party Favor
Because they look like something an astronaut would eat, these are a massive hit at kids’ birthday parties. Put them in small, clear bags with a “Galaxy Candy” label, and you’ll be the coolest parent on the block.
3. Cocktail Garnish
Drop a few into a glass of lemon-lime soda or even a fruity cocktail. They’ll fizz and slowly dissolve, releasing their flavor while giving you a little crunchy snack at the end of the drink.
How to Store Them Properly
If there is one thing you take away from this guide, let it be this: Moisture is the enemy. The moment you pull those Skittles out of the machine, they are 100% dry. They want to stay that way. If the humidity in your house is high, they will start absorbing water from the air immediately. Within a day, they will go from “crunchy” to “chewy” to “sticky.”
-
Mylar Bags: These are the gold standard for long-term storage. Use a heat sealer to close them up.
-
Oxygen Absorbers: Drop a small 20cc or 50cc oxygen absorber packet into the bag. This helps keep the environment inside the bag perfect.
-
Mason Jars: If you’re going to eat them within a week, a glass Mason jar with a tight lid works great. Plus, they look beautiful sitting on a shelf.
A Final Thought on the Magic of the Crunch
There is something strangely satisfying about taking a familiar food and turning it into something completely new. We’ve all eaten Skittles our whole lives, but eating a freeze-dried one makes you feel like you’re discovering it for the first time. It’s a bit of kitchen magic that never really gets old.
Whether you’re doing this as a hobby, a gift for friends, or even starting a small side business, the “perfect crunch” is all about patience and a little bit of heat. Don’t be afraid to experiment with different flavors or even mixing them with other candies like gummy bears or marshmallows.
The first time you hear that loud crack as you bite into a puffed-up purple Skittle, you’ll know exactly why people are so obsessed with this. It’s more than just candy—it’s an experience.
Happy “drying,” and I hope your first batch is as loud and crunchy as you’re imagining! Would you like me to help you brainstorm some creative labels or packaging ideas for your freeze-dried snacks?
PHWinSlotLogin, time to spin the slots! Always on the lookout for juicy jackpots. Hope this one doesn’t disappoint. phwinslotlogin
Jiliplay login provides smooth gaming experience. I can play smoothly at anytime. I must share the happiness: jiliplaylogin
So, I’m diving into the world of lucky cola agent. Hoping to grind out some wins. Any tips for a newbie agent?
MVR77 seems like a solid betting platform. Good options and easy to use. Hope I get lucky! Check out MVR77: mvr77
Q9betapp, not bad, not bad at all! App is easy to use, and I found the games I wanted. Maybe a few more promos? But happy overall. Cheers! q9betapp